ADFS and WAP SSL Administration
A technical guide for configuring SSL/TLS certificates for Active Directory Federation Services (ADFS) and Web Application Proxy (WAP) using PowerShell.

Introduction
Active Directory Federation Services (ADFS) provides Single Sign-On (SSO) capabilities across organisations and systems, allowing users to access external resources using their existing Active Directory credentials.
Web Application Proxy (WAP) is a role on the Remote Access server that provides access to internal web applications for external clients, using ADFS for authentication.
Because the certificate must be installed on multiple servers, the most straightforward approach is to use the .PFX format.
You can obtain the certificate either by using our CSR service or by exporting it from the MMC console once it has been installed.
Start by installing the certificate on all servers, including both ADFS and WAP nodes.
Then follow the ADFS Installation steps.
Finally, proceed to WAP Installation.
Exporting the certificate to a .PFX backup
- Log in to the server using an administrator account.
- Press Windows key + R
Type mmc.exe
Click OK.
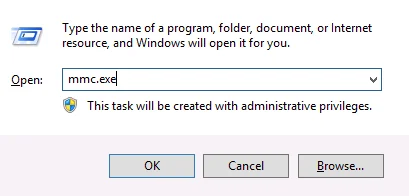
- Under the File menu, click Add/Remove Snap-in.
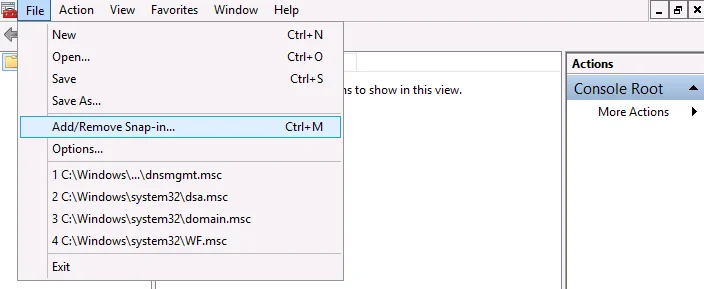
- Select Certificates.
Click Add.
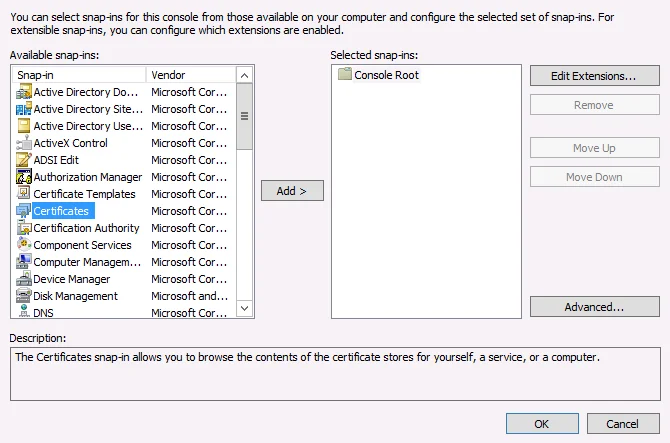
- Select Computer account.
Click Next.
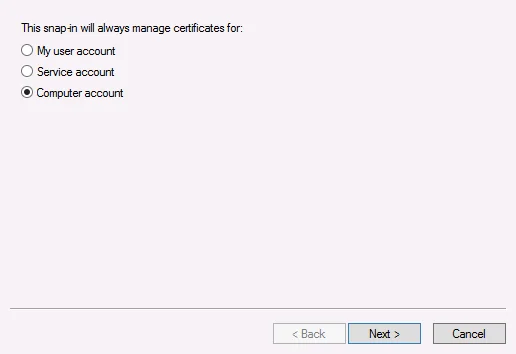
- Select Local computer.
Click Finish.
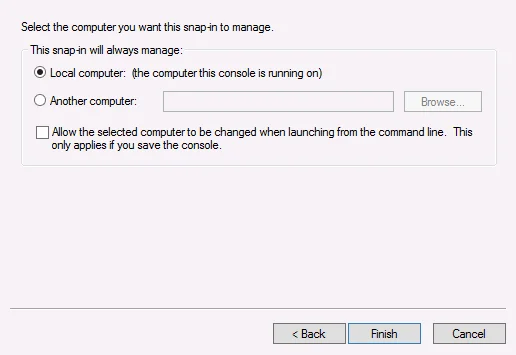
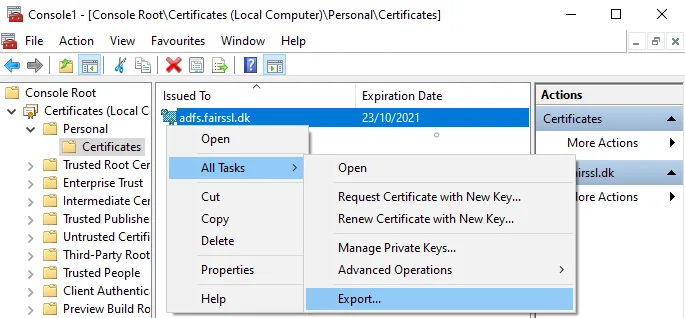
- Expand the tree structure until the Certificates folder under Personal is visible and select it.
Right-click the certificate you wish to export.
Select All Tasks.
Click Export.
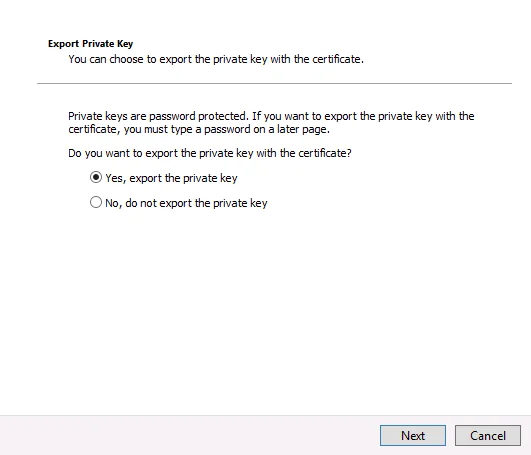
- Select Yes, export the private key.
Click Next.
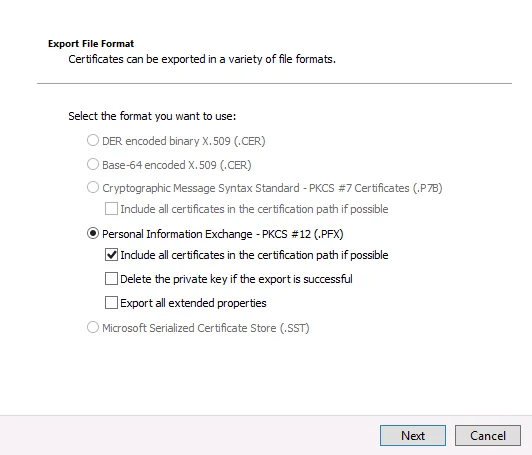
- Select Personal Information Exchange - PKCS #12 (.PFX).
Click Next.
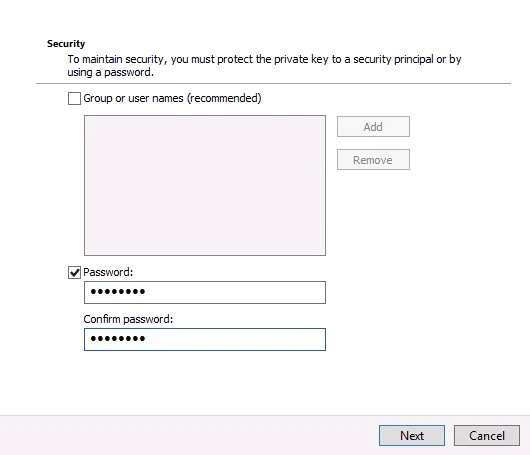
- Tick Password: and enter a password to protect the .PFX file (ensure you store this password securely).
Click Next.
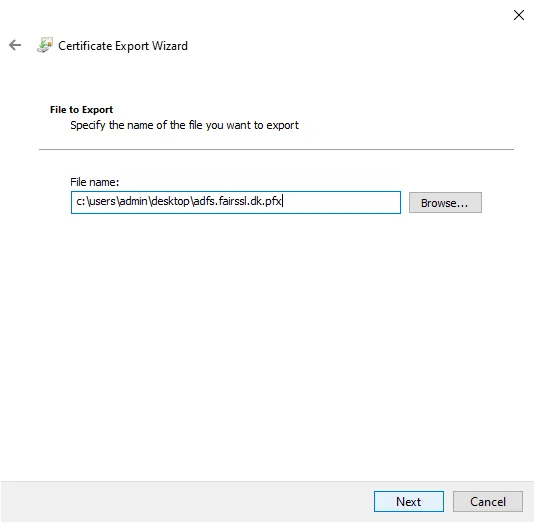
- Select a location and a name for the .PFX file; give it a descriptive name so it is easy to identify.
Click Next.
Click Finish.
Installing the certificate by importing a .PFX file
- Log in to the server using an administrator account.
Save the received file in a convenient location, such as the desktop.
- Press Windows key + R
Type mmc.exe
Click OK.
- Under the File menu, click Add/Remove Snap-in.
- Select Certificates.
Click Add.
- Select Computer account.
Click Next.
- Select Local computer.
Click Finish.
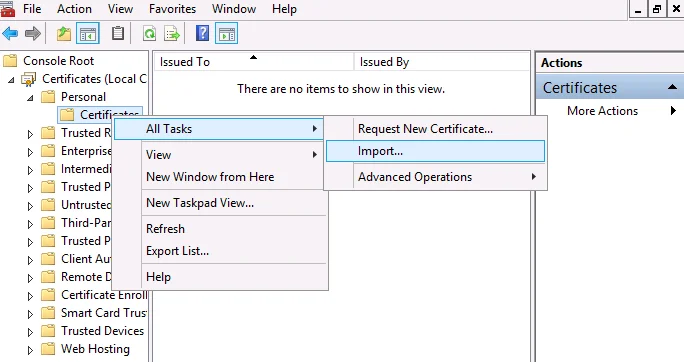
- Expand the tree structure until the Personal folder is visible.
Right-click Personal.
Select All Tasks.
Click Import.
- Click Browse and locate the .PFX file you saved.
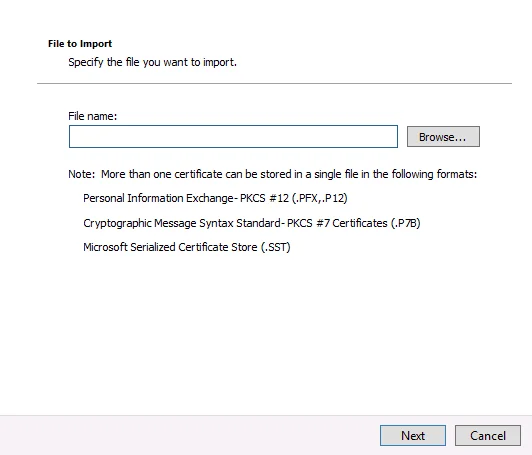
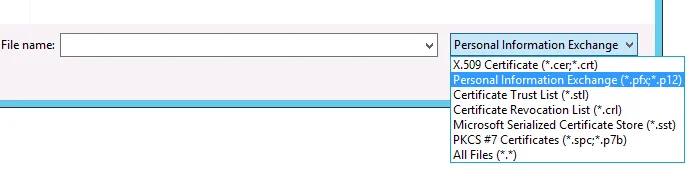
- Change the file format to Personal Information Exchange (*.pfx;*.p12) in the bottom right corner and select the correct file.
Click Open.
Click Next.
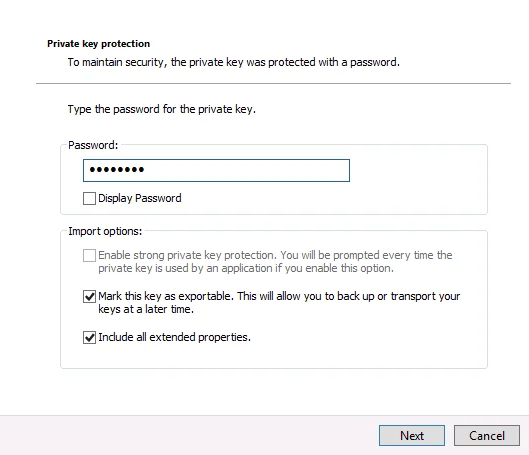
- If the file is password-protected (which is standard), enter the password here.
If you used our CSR service, you will have received the password via SMS.
Click Next.
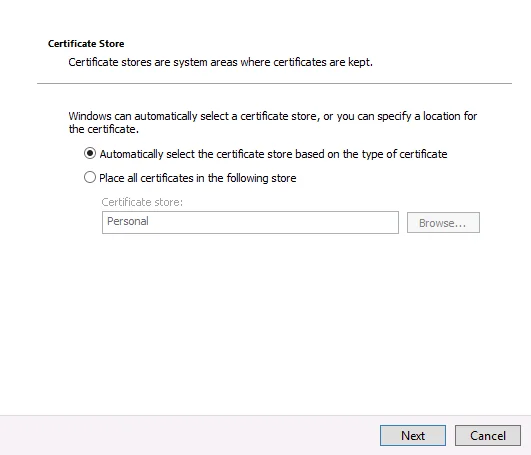
- Select Automatically select the certificate store based on the type of certificate.
Click Next.
Click Finish.
Installation on ADFS
- Log in to the primary ADFS server using an administrator account.
- Open PowerShell as an Administrator.
- Run the following command to view all installed certificates:
dir Cert:\LocalMachine\My\
- Run the following command to apply the new certificate using its thumbprint:
Set-AdfsSslCertificate -Thumbprint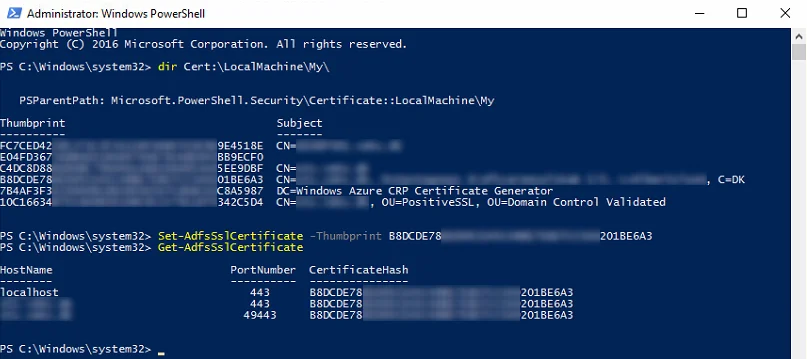
- Run the following command to verify that the certificate has been activated correctly:
Get-AdfsSslCertificate- If the ADFS servers are running Windows Server 2016 or later, the primary server will automatically update the secondary nodes. For Server 2012, this process must be repeated on each individual secondary server.
Installation on WAP
- Log in to the WAP server using an administrator account.
- Open PowerShell as an Administrator.
- Run the following command to use the new certificate:
- Set-WebApplicationProxySslCertificate -Thumbprint
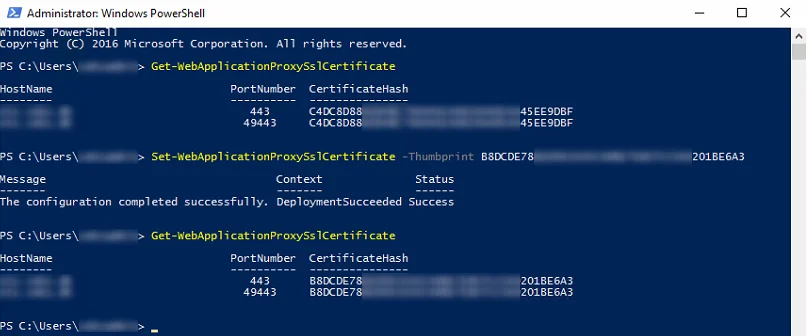
- Run the following command to verify that the certificate has been activated correctly:
Get-WebApplicationProxySslCertificate- This process must be repeated on all WAP servers in the farm.
Strengthen your TLS security
Use IIS Crypto to easily configure secure TLS protocols and cipher suites on your Windows Server.
IIS Crypto TLS configuration guide