SSL Certificate Administration for IIS 8, 8.5, and 10
A technical guide to managing SSL certificates on modern IIS versions (Windows Server 2012, 2016, 2019, and 2022), covering CSR generation, SNI configuration, and PFX management.

Introduction
This guide is divided into two sections depending on whether you are generating a CSR yourself or if you are installing a pre-bundled certificate and key (e.g. from our FairCSR service or an export from another server).
If you are generating the CSR file locally, please follow Installation from CSR.
If you already have a PFX file (e.g. from our CSR service or a backup from another server), please follow Installation from PFX file.
Installation from CSR
Installing an SSL certificate based on a CSR generated directly on the server.
- Generating a CSR on the target server.
- Installing a certificate ordered via CSR on the server where the CSR was created.
- Binding the certificate to the default website to configure the site for HTTPS.
- Binding the certificate to additional websites using SNI (Server Name Indication).
Installation from PFX file
Installing an SSL certificate from a PFX file (e.g. received via FairCSR service).
- Installing the certificate from a PFX file (FairCSR service or export from another server).
- Binding the certificate to the default website.
- Binding the certificate to additional websites using SNI (Server Name Indication).
Exporting a Certificate to a PFX file
Exporting an installed SSL certificate to a PFX file for backup or migration.
- Exporting a certificate to a PFX file for installation on another server.
Generating a CSR
- Log on to the server with administrator privileges.
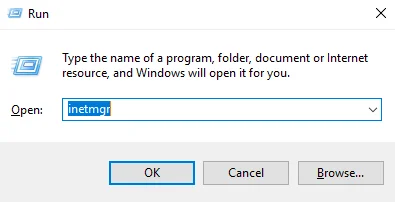
Press Windows key + R.
Type inetmgr
Click OK.
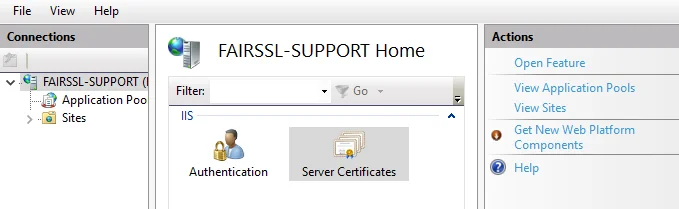
- Under Connections on the left, select the server where you want to generate the CSR.
In the center pane, double-click Server Certificates.
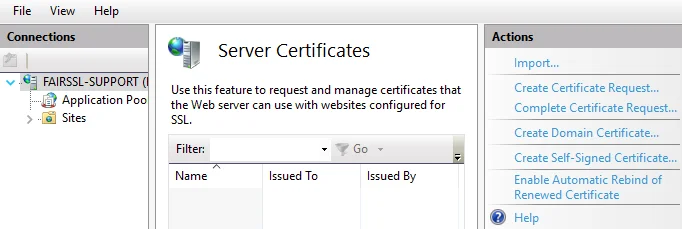
- Under Actions on the right, click Create Certificate Request.
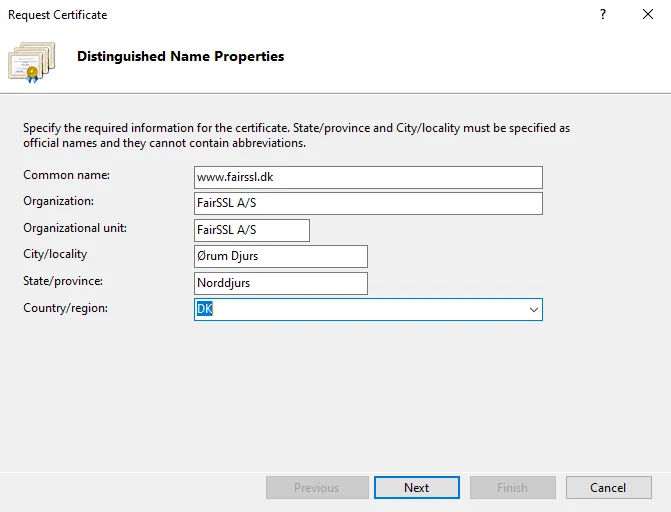
- Fill in the Distinguished Name properties as follows:
- Common name (CN): This is typically the Fully Qualified Domain Name (FQDN) you are securing (e.g. www.fairssl.dk).
If you are ordering a Wildcard certificate, use *.fairssl.dk.
- Organization (O): Your legal company name.
- Organizational unit (OU): Department name (can be left blank).
- Locality (L): City.
- State (ST): County or Province.
- Country (C): Two-letter country code (e.g. GB, DK, SE) in uppercase.
Click Next.
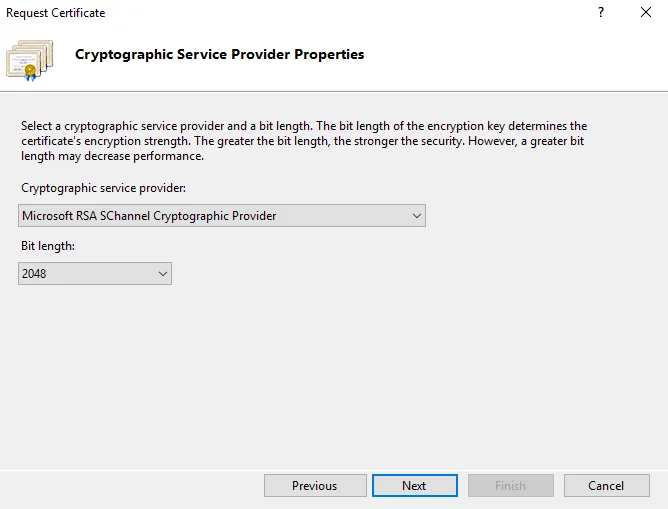
- Specify the following:
- Cryptographic service provider: Microsoft RSA SChannel Cryptographic Provider.
- Bit Length: 2048.
Click Next.
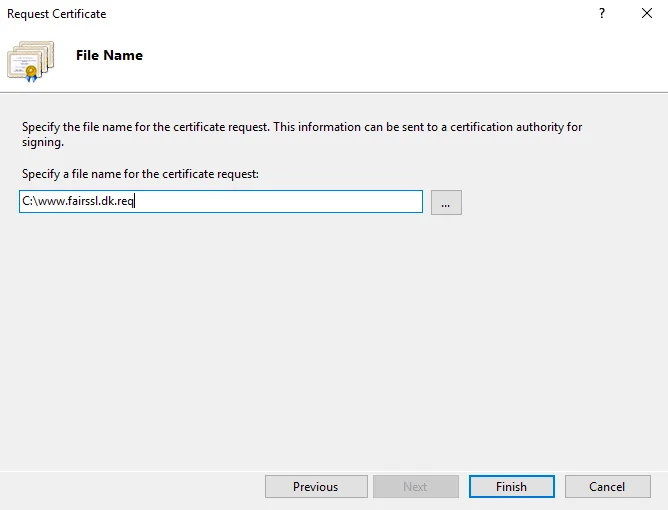
- Specify a path and filename to save the CSR request.
Click Finish.
Result:
The CSR is a plain text file. You can open it in a text editor like Notepad.
Copy the entire text, including the headers and footers, and paste it into the order form, or attach the file to an email.
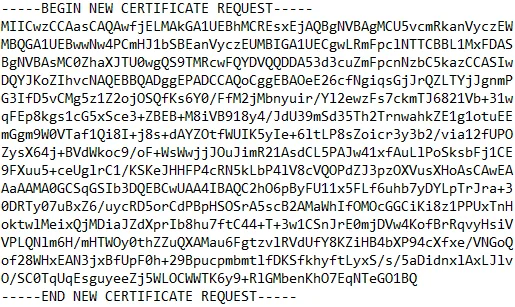
A CSR contains no confidential information or private keys; it is safe to send via unencrypted email.
Installing a Certificate Ordered via CSR
We recommend installing the intermediate certificate first. You should have received this alongside your server certificate.
Installing the Intermediate Certificate
- Log on to the server with administrator privileges.
- Open a text editor like Notepad.
Copy the text of the Intermediate certificate from your delivery email (include all dashes).
Save the file as intermediate.cer on your desktop.
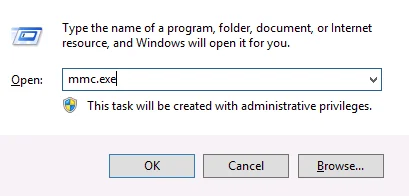
- Press Windows key + R.
Type mmc.exe
Click OK.
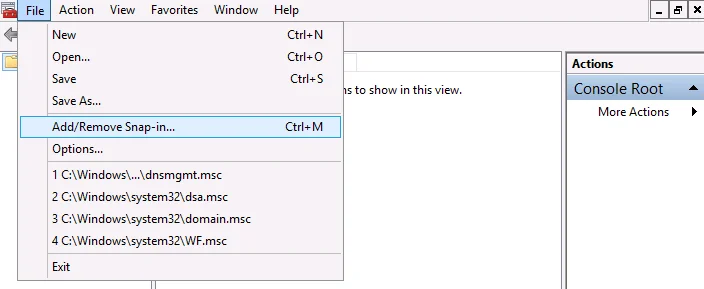
- Under File, click Add/Remove Snap-in.
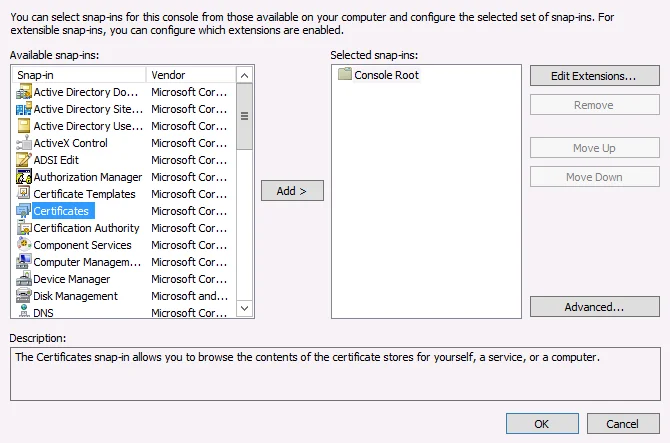
- Select Certificates from the list and click Add.
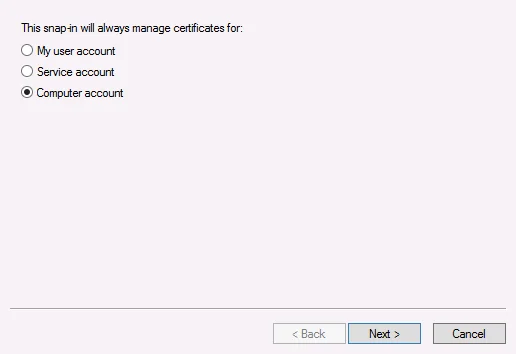
- Select Computer account and click Next.
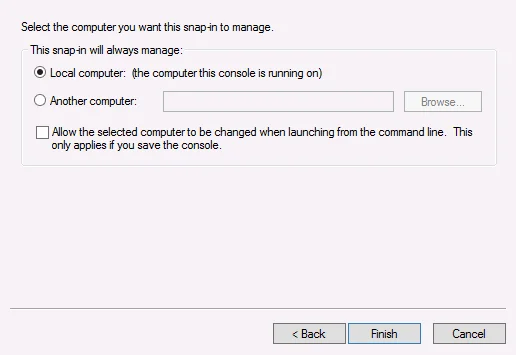
- Select Local Computer and click Finish.
- Expand Certificates (Local Computer).
Expand Intermediate Certification Authorities.
Right-click on Certificates.
Under All Tasks, click Import.
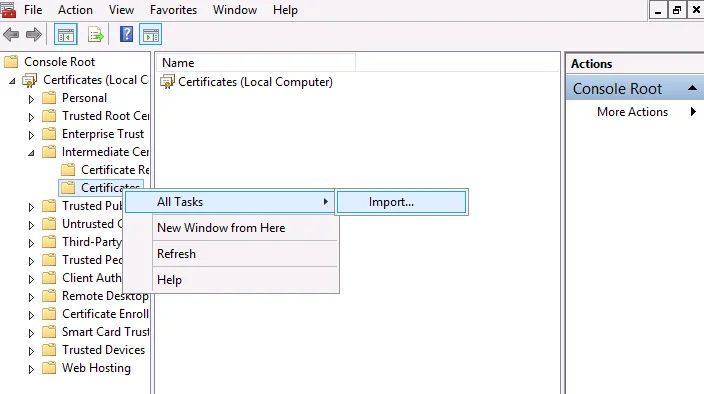
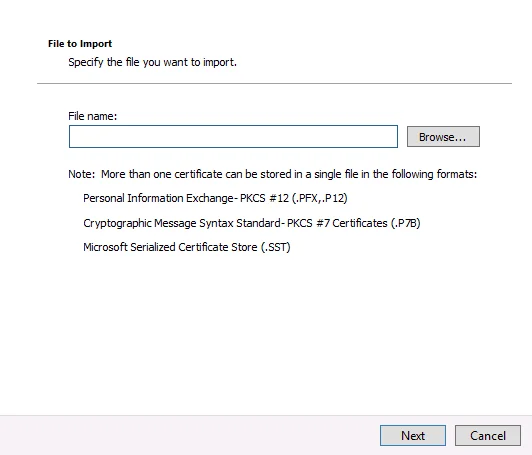
- Click Browse... and navigate to your saved file.
Select the file and click Open, then Next.
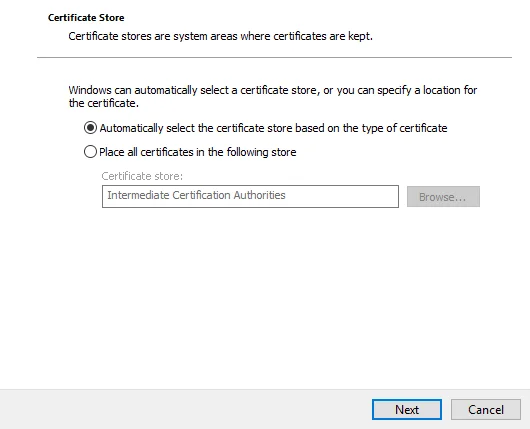
- Select Automatically select the certificate store based on the type of certificate.
Click Finish.
Note: You may need to restart services or the server for the changes to take effect across all applications.
Intermediate Certificates
If you need to download specific intermediate certificates manually, you can find them here. We always recommend using the ones provided in your delivery email as they are matched to your specific server certificate.
Intermediate Certificates from various CAs
Installing the Server Certificate
- Log on to the server with administrator privileges.
Press Windows key + R.
Type inetmgr
Click OK.
- Under Connections on the left, select the server.
In the center pane, double-click Server Certificates.
- Under Actions on the right, click Complete Certificate Request.
- Browse to your certificate file and click Open.
Enter the following:
- Friendly name: A descriptive name to identify the certificate in IIS (e.g. "fairssl.com - expires 2027"). This can be changed later.
- Select a certificate store for the new certificate: Select Personal.
Click OK to install the certificate.
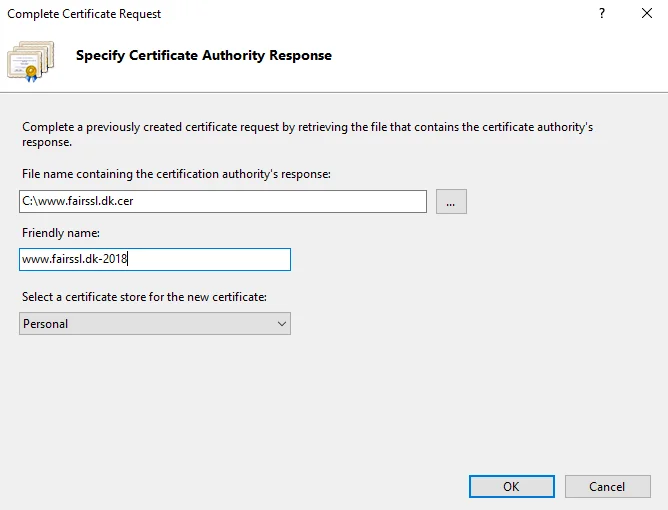
The certificate is now installed, but you must still bind it to your website in IIS Manager.
Installing a Certificate from a PFX file
- Log on to the server with administrator privileges.
Save the PFX file to an accessible location, such as the desktop.
- Press Windows key + R.
Type mmc.exe
Click OK.
- Under File, click Add/Remove Snap-in.
- Select Certificates and click Add.
- Select Computer account and click Next.
- Select Local computer and click Finish.
- Expand the tree until you see the Personal folder.
Right-click on Personal.
Under All Tasks, click Import.
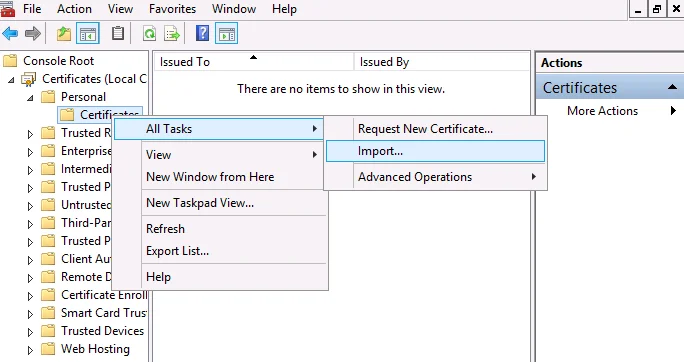
- Click Browse... and navigate to your PFX file.
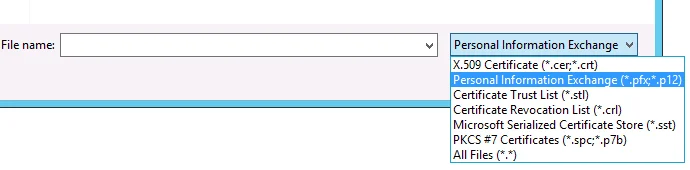
- Change the file extension filter to Personal Information Exchange (*.pfx;*.p12) and select your file.
Click Open and then Next.
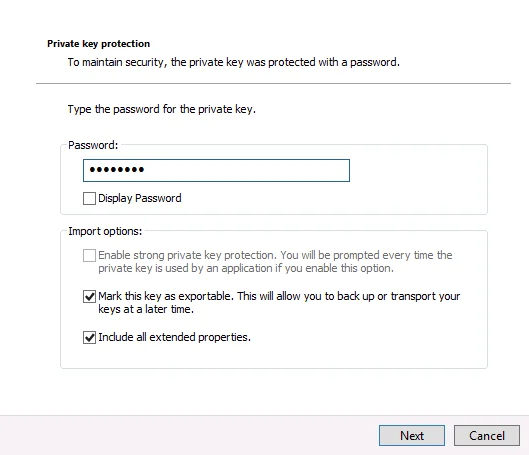
- Enter the password for the PFX file.
If using FairCSR service, you will have received this code via SMS when the order was initiated.
Leave the default options and click Next.
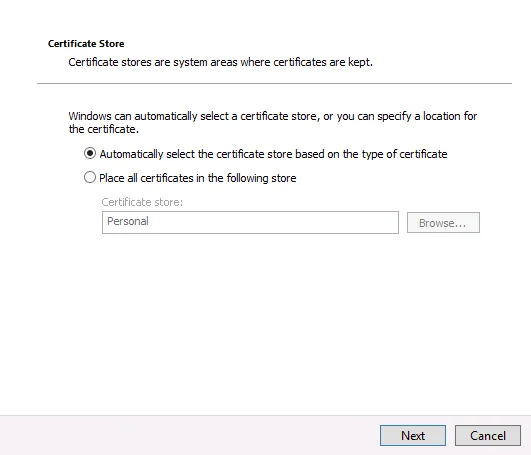
- Select Automatically select the certificate store based on the type of certificate.
Click Next and then Finish.
Binding the Certificate to Websites
If you have multiple certificates for different sites, ensure they are all installed. Use Friendly Names to easily identify which certificate belongs to which site.
Binding a Certificate to the Default Website
- Log on to the server with administrator privileges.
Press Windows key + R.
Type inetmgr
Click OK.
- In IIS Manager, select the website you want to secure from the Connections pane.
Under Actions on the right, click Bindings.
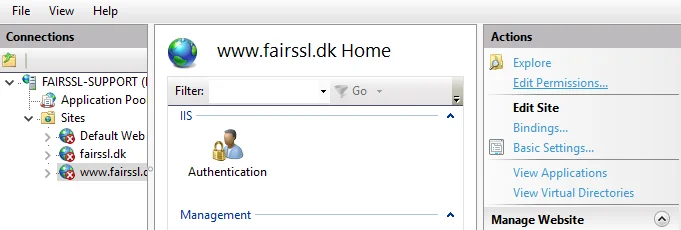
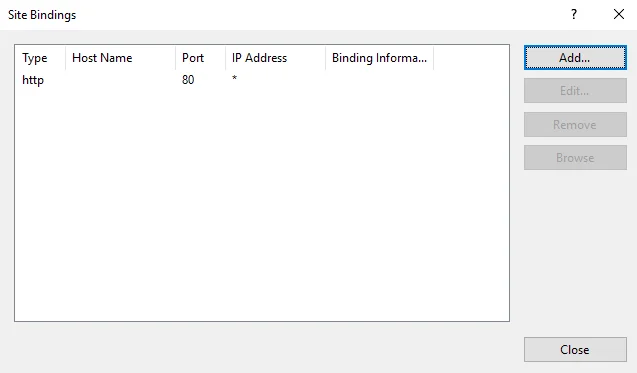
- Click Add. If an HTTPS binding already exists, select it and click Edit.
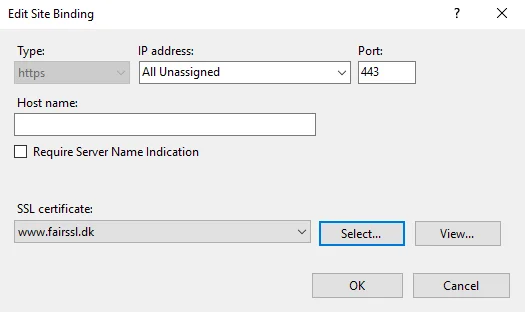
- Configure the binding:
- Type: Select https.
- IP address: All Unassigned (default) or a specific IP.
- Port: 443.
- SSL certificate: Select your installed certificate. Use View to verify if unsure.
Click OK and then Close.
The website is now configured for HTTPS. We recommend testing the installation with our SSL Scanner: https://www.fairssl.com/en/tools/ssl-scanner
Binding Certificates to Additional Websites (SNI)
- Log on to the server with administrator privileges.
Open IIS Manager (inetmgr).
- Select the additional website you wish to secure.
Under Actions, click Bindings.
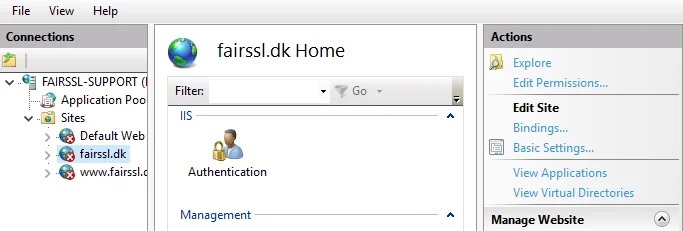
- Click Add (or Edit if HTTPS exists).
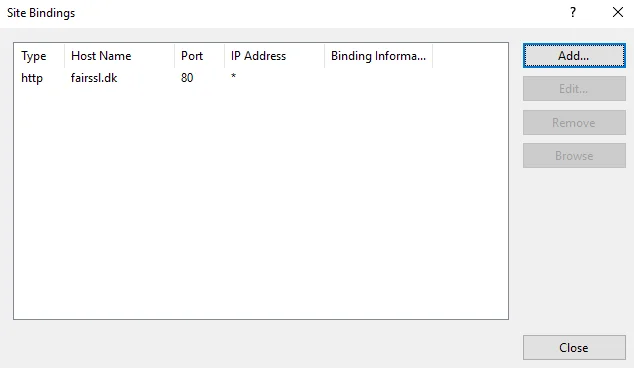
- Configure the SNI binding:
- Type: https.
- IP address: All Unassigned or specific IP.
- Port: 443.
- Host name: Enter the FQDN for this site (e.g. mail.fairssl.dk).
- SSL certificate: Select the correct certificate.
- Check Require Server Name Indication.
Click OK.
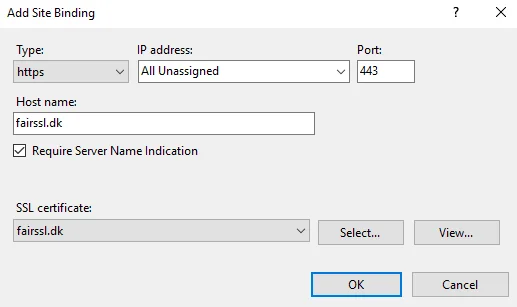
Repeat these steps for all websites. Note: If a site uses multiple names (e.g. fairssl.dk and www.fairssl.dk), you must create a binding for each name.
Your websites are now secured. Test them at: https://www.fairssl.com/en/tools/ssl-scanner
Exporting a Certificate to a PFX backup
- Log on to the server with administrator privileges.
- Press Windows key + R, type mmc.exe, and click OK.
- Under File, click Add/Remove Snap-in.
- Select Certificates, click Add, select Computer account, then Local computer, and click Finish.
- Navigate to Certificates (Local Computer) > Personal > Certificates.
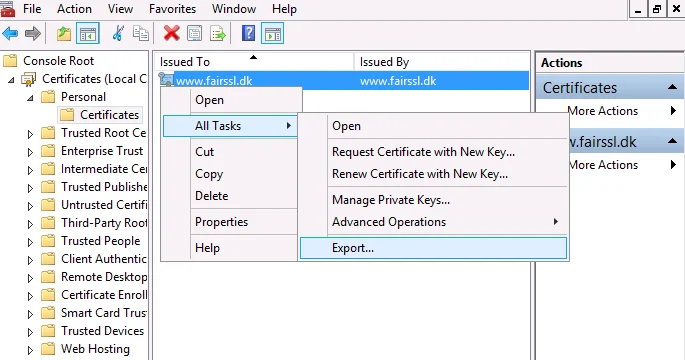
Right-click the certificate you wish to export, select All Tasks, and then Export.
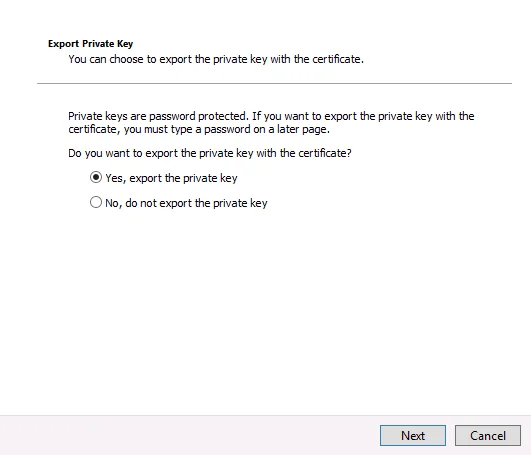
- Select Yes, export the private key. Click Next.
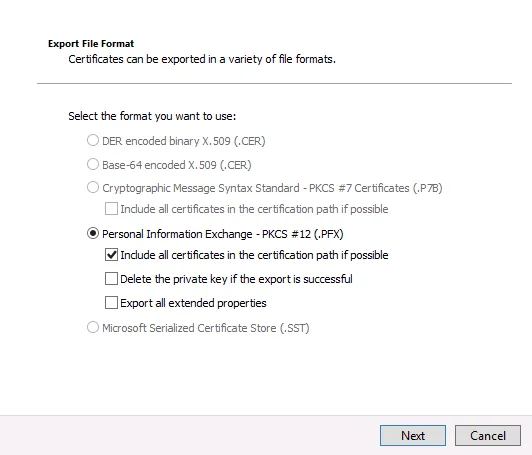
- Select Personal Information Exchange - PKCS #12 (.PFX). Click Next.
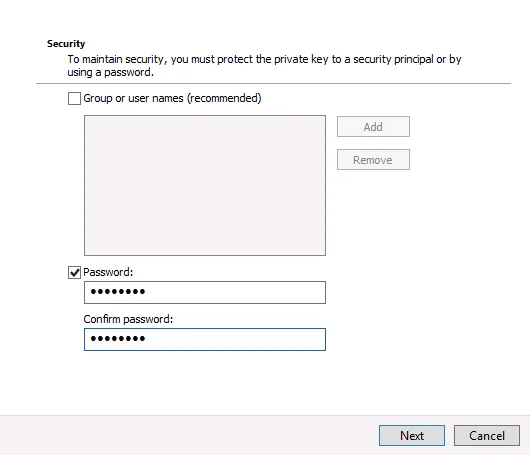
- Tick Password: and enter a strong password for the PFX file. Secure this password carefully.
Click Next.
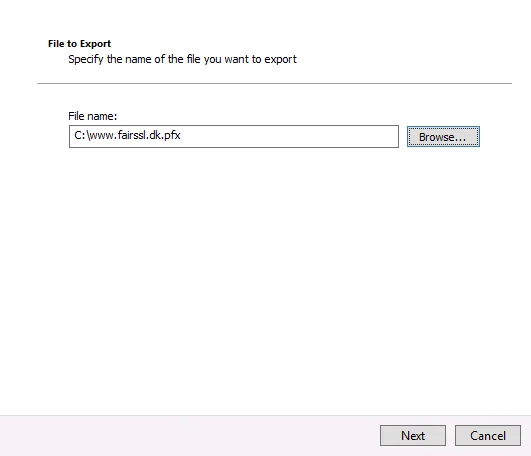
- Select a location and filename for the PFX file. Click Next and then Finish.
Strengthen your TLS security
Use IIS Crypto to easily configure secure TLS protocols and cipher suites on your Windows Server.
IIS Crypto TLS configuration guide